| Author |
Message |
JohnYoung
Silver CB900F


Joined: Jun 30, 2007
Posts: 1266
Location: Johannesburg, South Africa

|
 Posted:
Fri Nov 11, 2011 10:05 am |
 
|
Clocks after resto.  The clear perspex was badly scratched. I stripped the cluster and wet sanded it with 1500 3M grit, and then polished with Meguiar's PlastX. Came out like new:

I was lucky that the fuse cover was in good nick...
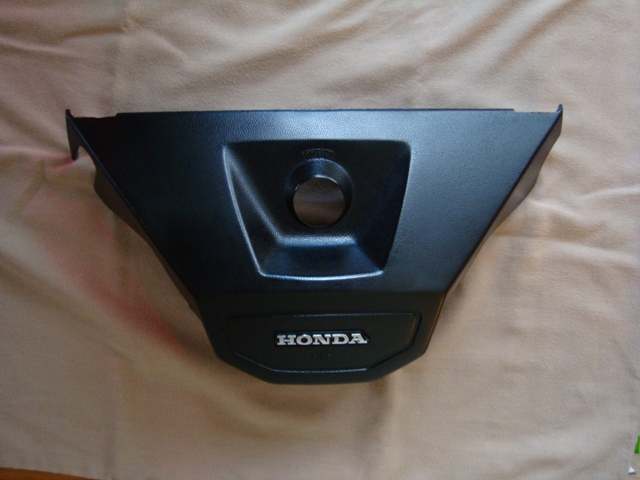
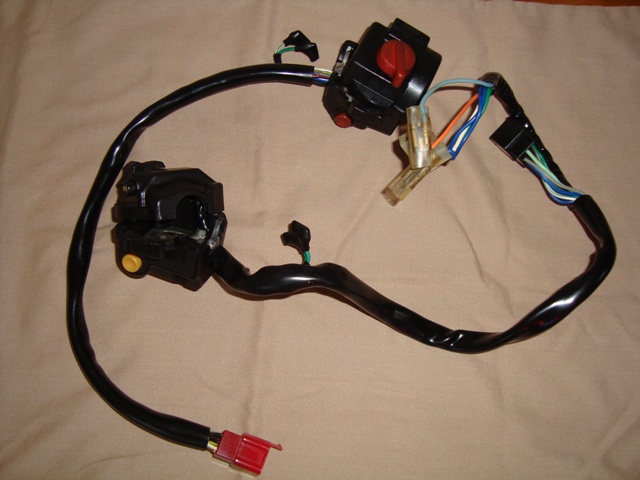
...as well as the switches:
 |
_________________
John Young
1980 CBX1000 (New)
1981 CB750F (winner or 20 concours´ - now retired)
1982 CB450T (Wife´s)
1983 CB1100F (Mine) |
|


|
|
metalganz
Black CB750F


Joined: Jul 31, 2009
Posts: 982
Location: Zwolle Holland
|
| Posted:
Fri Nov 11, 2011 2:54 pm |
|
Fantastic results John,again very very nice.It`s like turning back the movie and the bike will end up in the crate.
Wim |
| |
|
|
|
|
JohnYoung
Silver CB900F
Joined: Jun 30, 2007
Posts: 1266
Location: Johannesburg, South Africa
|
| Posted:
Fri Nov 11, 2011 7:50 pm |
|
| metalganz wrote: |
Fantastic results John,again very very nice.It`s like turning back the movie and the bike will end up in the crate.
Wim |
Baie dankie Wim!! Groeten... |
_________________
John Young
1980 CBX1000 (New)
1981 CB750F (winner or 20 concours´ - now retired)
1982 CB450T (Wife´s)
1983 CB1100F (Mine) |
|
|
|
|
JohnYoung
Silver CB900F
Joined: Jun 30, 2007
Posts: 1266
Location: Johannesburg, South Africa
|
| Posted:
Sat Nov 12, 2011 8:12 am |
|
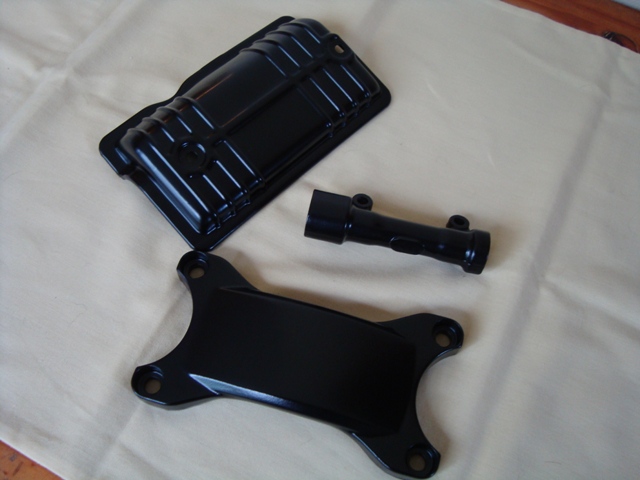
Here is the starter motor cover, fork brace and front brake splitter:
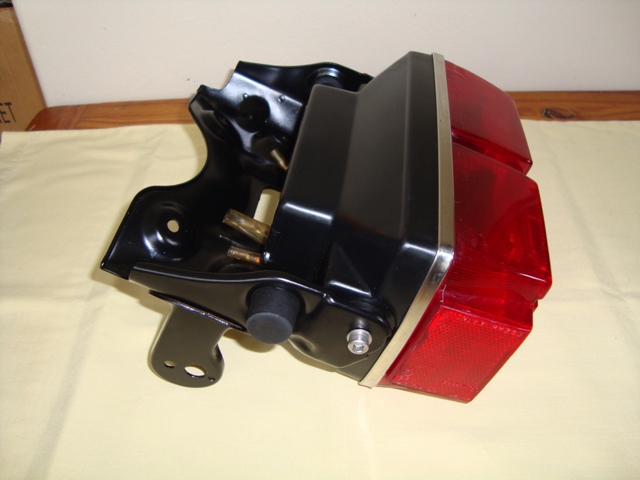
Tail light section:
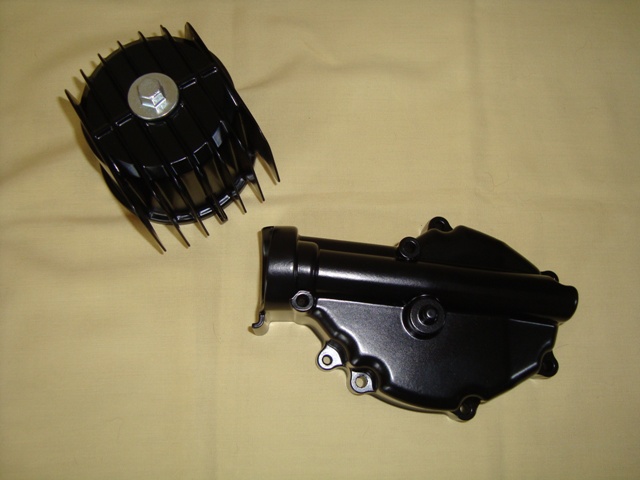
Oil pump cover and oil filter housing:
 |
_________________
John Young
1980 CBX1000 (New)
1981 CB750F (winner or 20 concours´ - now retired)
1982 CB450T (Wife´s)
1983 CB1100F (Mine)
Last edited by JohnYoung on Sat Nov 12, 2011 6:09 pm; edited 1 time in total |
|
|
|
|
JohnYoung
Silver CB900F
Joined: Jun 30, 2007
Posts: 1266
Location: Johannesburg, South Africa
|
| Posted:
Sat Nov 12, 2011 8:14 am |
|
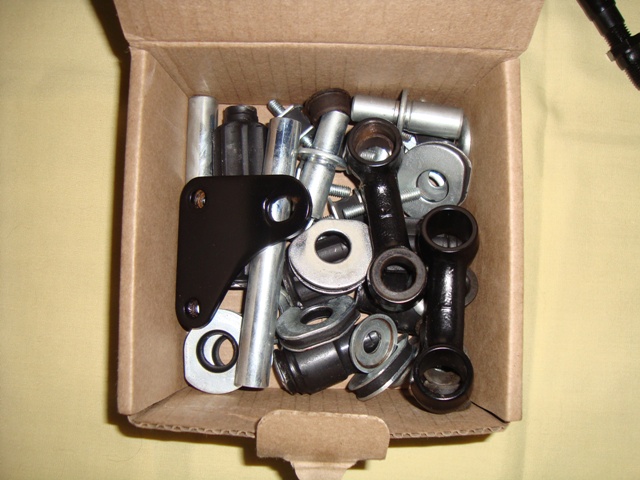
Engine mountings. This is going to be a challenge to put together as I have never worked on a rubber mounted motor before. Anyway, I plated all the steel parts of the mounts as they were quite badly rusted:
 |
_________________
John Young
1980 CBX1000 (New)
1981 CB750F (winner or 20 concours´ - now retired)
1982 CB450T (Wife´s)
1983 CB1100F (Mine) |
|
|
|
|
CDN1100F
Friend of the Board


Joined: Oct 19, 2007
Posts: 2342
Location: London, Ontario, Canada
|
| Posted:
Tue Nov 15, 2011 12:07 pm |
|
Keep the pics coming John, I am truly inspired by your work!! Excellent resto log you have going here. Keep it up, it's like reading a good book, where you can't wait to the ending.
Cheers!
Chris |
| |
|

|
|
Gyesdad
Guest

|
| Posted:
Tue Nov 15, 2011 4:19 pm |
|
I think you're doing a great job with it John.
Like everyone else, I'm enjoying reading the log and can't wait to see the finished article!  |
| |
|
|
|
|
JohnYoung
Silver CB900F
Joined: Jun 30, 2007
Posts: 1266
Location: Johannesburg, South Africa
|
| Posted:
Tue Nov 15, 2011 6:29 pm |
|
Howdy Chris and Gyesdad. Thanks a million for the comments gentlemen. I have a lot more that I have done and will be taking more pix this weekend. I managed to get a bigger oven (an old one bought from a friend). Now I will be able to do things like the torque arm, front forks, battery box, rims etc 
I have also pretty much cleaned up most of the engine parts and carbs/airbox are done. I will also rebuild the stock rear shocks as per swiftnick and the other guys methods. I will be turning those parts myself so hopefully all will be good. Thanks again guys!!  |
_________________
John Young
1980 CBX1000 (New)
1981 CB750F (winner or 20 concours´ - now retired)
1982 CB450T (Wife´s)
1983 CB1100F (Mine) |
|
|
|
|
metalganz
Black CB750F
Joined: Jul 31, 2009
Posts: 982
Location: Zwolle Holland
|
| Posted:
Tue Nov 15, 2011 6:32 pm |
|
John,I see on the foto that you have done the enginemountingrubbers also.I never thought to do that,but why not!
So thanks for sharing.
Wim |
| |
|
|
|
|
petrat
Friend of the Board

Joined: Dec 19, 2005
Posts: 3651
Location: Ottawa, Ontario, Canada
|
| Posted:
Tue Nov 15, 2011 7:45 pm |
|
John, very VERY nice work! |
_________________
PETRAT
http://www.darrenbeggcustoms.com
Vapor Blasting Services
Dealer for Wossner, Cometic, OHLINS, OZ Racing, Dymag, Marchesini, SUDCO, JB-Power, APE, Spiegler, Setrab, KOSO,
Brembo, Lightech, Speedcell, Racefit, Braketech, Ferodo Pads, Wood |
|

|
|
txscbf1100
Black CB750F

Joined: Jun 21, 2006
Posts: 794
Location: Yoakum, Tx.
|
| Posted:
Wed Nov 16, 2011 2:33 am |
|
Very nice work John. Looks great!! 
David |
| |
|
|
|
|
chico
CB1100F

Joined: Dec 16, 2008
Posts: 2455
Location: suffern, ny
|
| Posted:
Wed Nov 16, 2011 5:32 am |
|
John, that bike will be too nice to ride.
Chico |
_________________
´79 CBX sold
"83 CB 1100 Red
´99 Valkyrie Interstate sold
2000 Harley Fatboy
2005 Softail Deluxe
´07 Yamaha FZ traded
'17Triumph Tiger 800
'17 Triumph Bobber
"Peace is that brief glorious moment in history when everybody stands around |
|
|
|
|
BluesMan
CB1100F

Joined: Jun 26, 2003
Posts: 2794
Location: Cincinnati, Oh.
|
| Posted:
Wed Nov 16, 2011 6:22 am |
|
Very nice work John. I find it very inspiring to see what one person with dreams can accomplish. |
| |
|
|
|
|
sonicrete
Red CB1100F
Joined: Aug 19, 2003
Posts: 15472
Location: Lancaster,Ohio
|
| Posted:
Wed Nov 16, 2011 6:24 am |
|
Hey BluesMan have not heard from you for quite a while. |
| |
|
|
|
|
larryg
CB1100F

Joined: Feb 28, 2005
Posts: 3390
Location: western mass
|
| Posted:
Wed Nov 16, 2011 12:52 pm |
|
Sweet baby Jesus that gauge cluster came out nice!! It looks new!! |
| |
|
|
|
|
JohnYoung
Silver CB900F
Joined: Jun 30, 2007
Posts: 1266
Location: Johannesburg, South Africa
|
| Posted:
Thu Nov 17, 2011 6:30 pm |
|
Hi guys - thanks very much for the comments. I will be posting more pix this weekend. Frame and swingarm in for powdercoating as they wouldn't fit in my oven. I am also waiting for some stuff from Z1 and my local Honda dealer (TRAC seals etc). Again thanks for the nice comments!!! |
_________________
John Young
1980 CBX1000 (New)
1981 CB750F (winner or 20 concours´ - now retired)
1982 CB450T (Wife´s)
1983 CB1100F (Mine) |
|
|
|
|
kcdaniels
Hawk


Joined: Apr 22, 2010
Posts: 420
Location: Lake Placid Fl
|
| Posted:
Thu Nov 17, 2011 9:48 pm |
|
Yea plus 1 on the gauge cluster ! just great work all the way around !!!!!
Keep the pics. coming
Dan |
_________________
Black 79 750f |
|
|
|
|
JohnYoung
Silver CB900F
Joined: Jun 30, 2007
Posts: 1266
Location: Johannesburg, South Africa
|
| Posted:
Thu Jan 19, 2012 7:27 am |
|
| kcdaniels wrote: |
Yea plus 1 on the gauge cluster ! just great work all the way around !!!!!
Keep the pics. coming
Dan |
Thanks Dan - some pics coming in a few moments... |
_________________
John Young
1980 CBX1000 (New)
1981 CB750F (winner or 20 concours´ - now retired)
1982 CB450T (Wife´s)
1983 CB1100F (Mine) |
|
|
|
|
JohnYoung
Silver CB900F
Joined: Jun 30, 2007
Posts: 1266
Location: Johannesburg, South Africa
|
| Posted:
Thu Jan 19, 2012 7:41 am |
|
OK here are some more pic's of stuff that I have been doing.
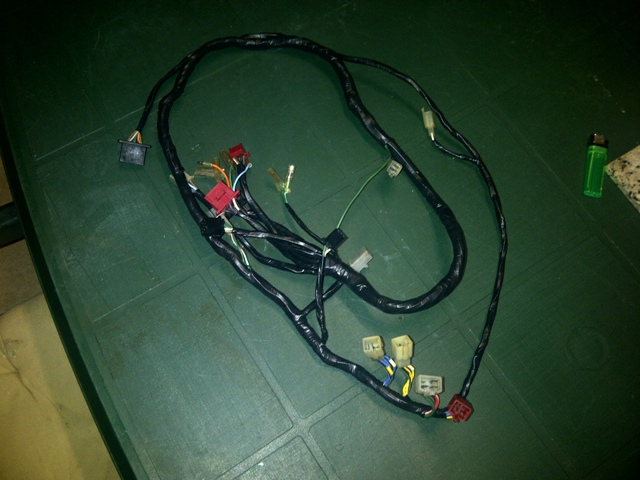
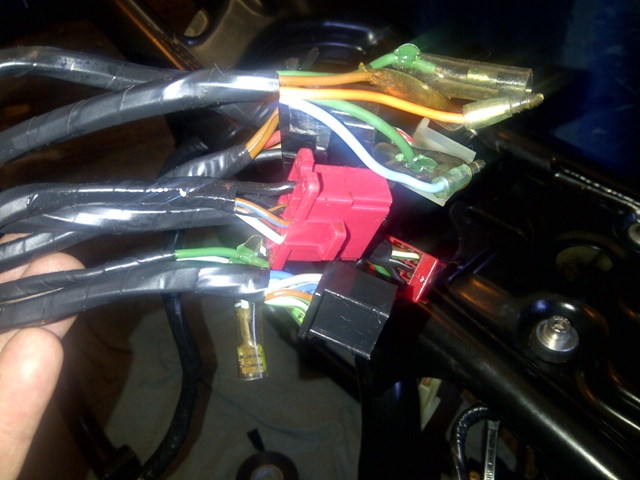
Wiring loom after a clean up and retape. I soaked the loom in a water based degreaser for a week and everything came out like new:
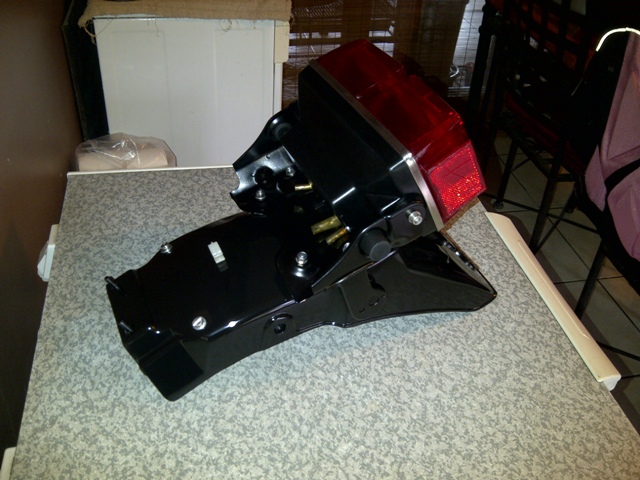
Here is the rear fender with the tail light mounted on it:
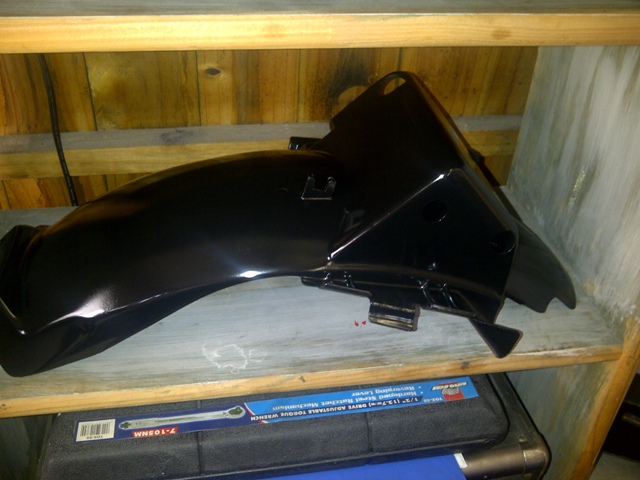
The rear mudguard. I had some problems with fisheying when painting these plastic parts. I wiped down the entire plastic surface with lacquer thinners and then resprayed. Worked beautifully. I used plastic paint from Rustoleum (a US product, and the same product I used on my 750F).
More to come... |
_________________
John Young
1980 CBX1000 (New)
1981 CB750F (winner or 20 concours´ - now retired)
1982 CB450T (Wife´s)
1983 CB1100F (Mine) |
|
|
|
|
JohnYoung
Silver CB900F
Joined: Jun 30, 2007
Posts: 1266
Location: Johannesburg, South Africa
|
| Posted:
Thu Jan 19, 2012 7:56 am |
|
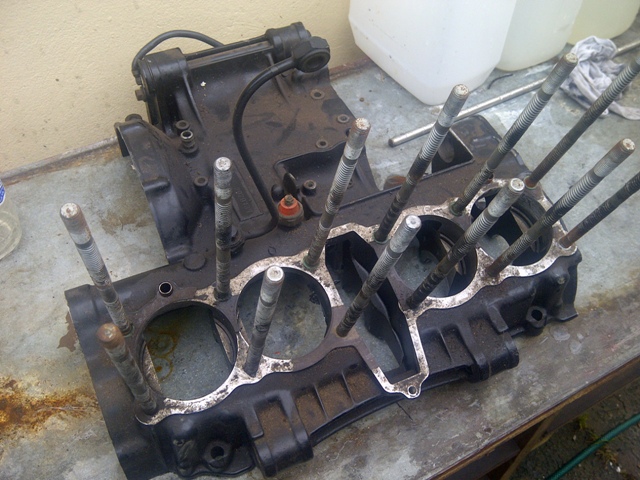
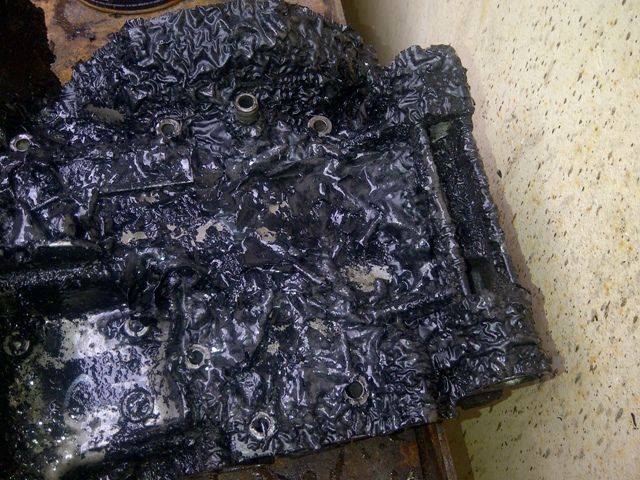
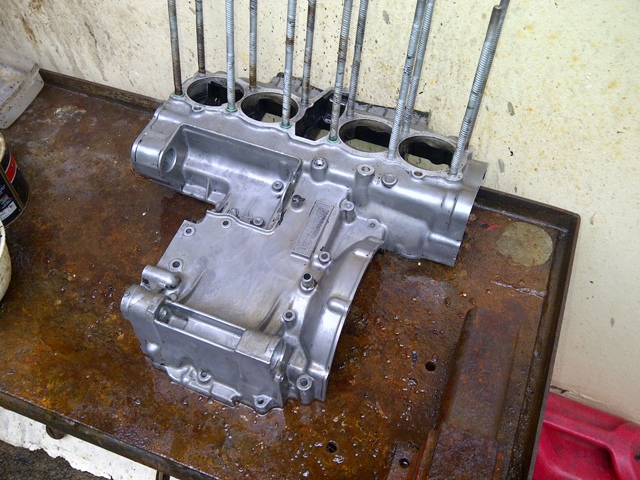
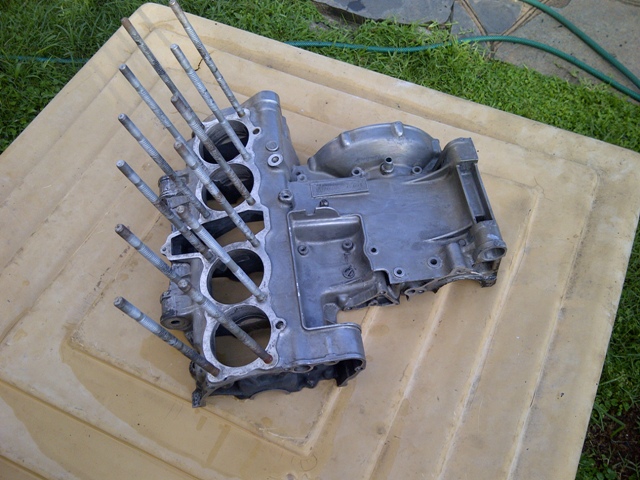
Stripping the engine cases was a filthy job and was labour intensive. The reason for this is I used conventional paint stripper and a high pressure water cleaner, as opposed to blasting it. Call it paranoia, I am scared that grit will get into the motor that I won't be able to get out. Here is the top case progress:
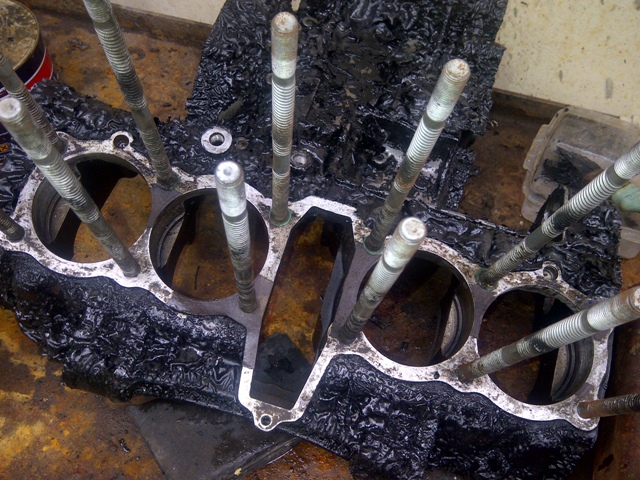
Here is the lower crankcase progress:
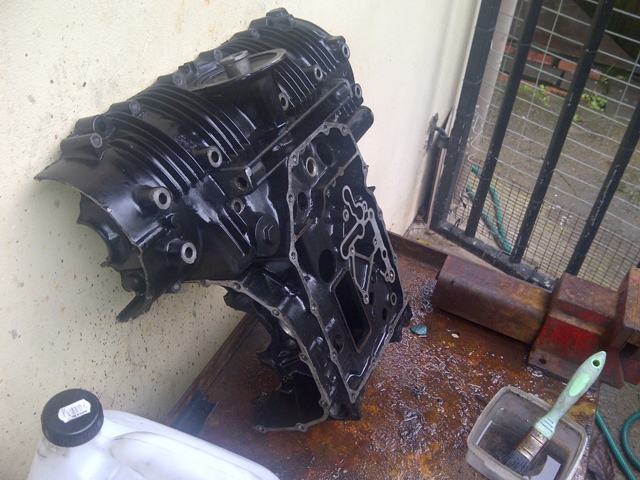
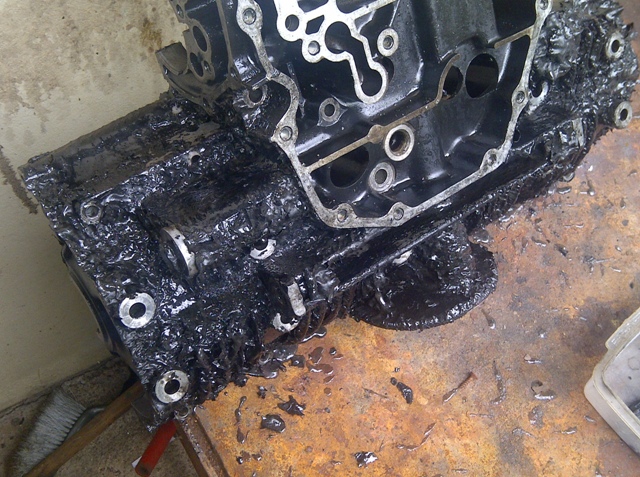
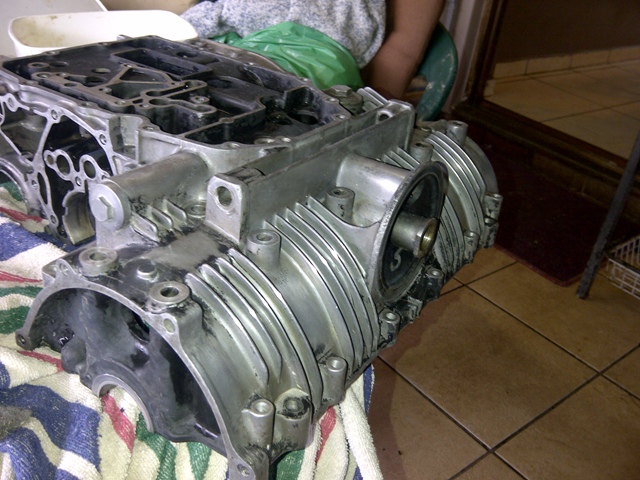
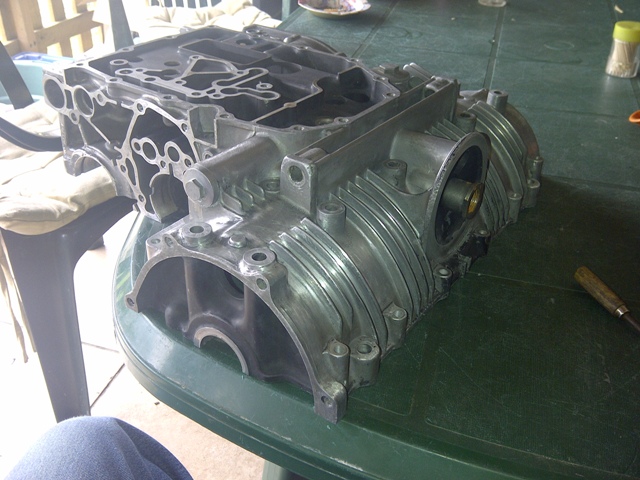
Yes, I am going to powder coat these. |
_________________
John Young
1980 CBX1000 (New)
1981 CB750F (winner or 20 concours´ - now retired)
1982 CB450T (Wife´s)
1983 CB1100F (Mine)
Last edited by JohnYoung on Thu Jan 19, 2012 3:56 pm; edited 1 time in total |
|
|
|
|
JohnYoung
Silver CB900F
Joined: Jun 30, 2007
Posts: 1266
Location: Johannesburg, South Africa
|
| Posted:
Thu Jan 19, 2012 8:29 am |
|
I also stripped the block with paint stripper and high pressure water:
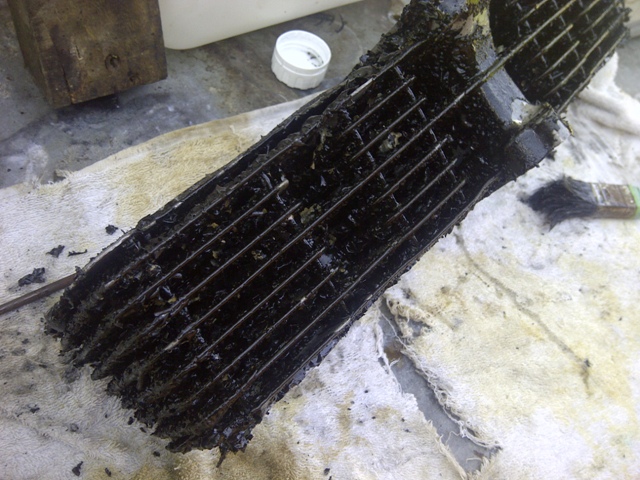
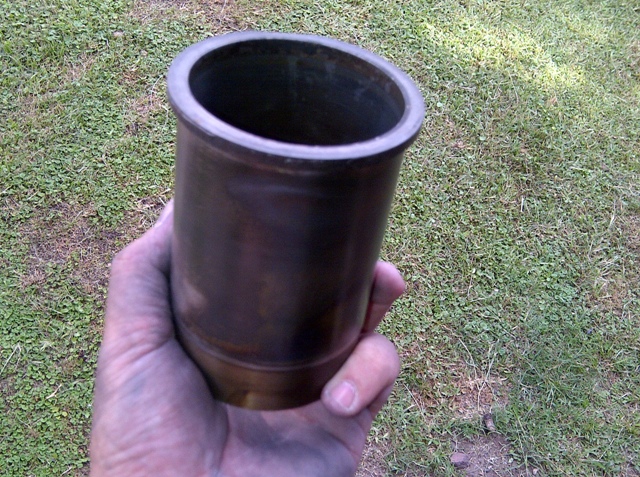
Before stripping the block, I removed the sleeves. Removing the sleeves is easy. Heat up the block on a stove and the sleeves practically fall out. There are a lot of fins that need welding up. I will try this myself.
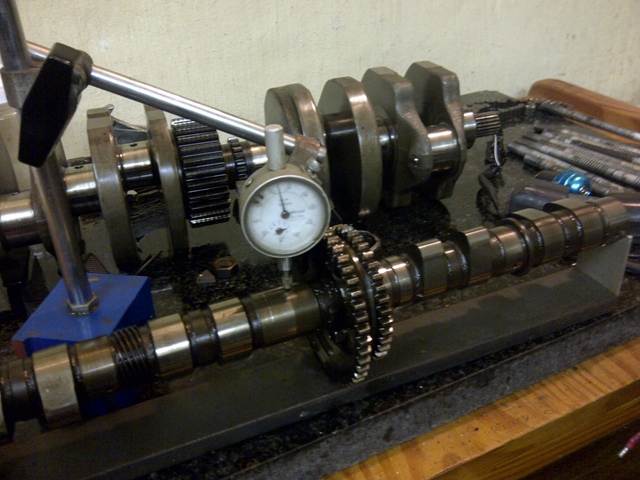
Checking straightness of cams. Not really going to help, both camshafts I have are so worn, but I will have to use them until I can get them built up.
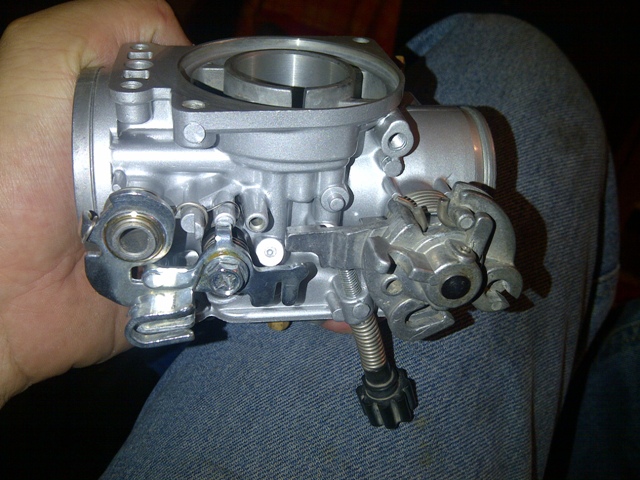
Here is one of the carb's I have done. The bank is complete and I will be posting some pics soon.
 |
_________________
John Young
1980 CBX1000 (New)
1981 CB750F (winner or 20 concours´ - now retired)
1982 CB450T (Wife´s)
1983 CB1100F (Mine) |
|
|
|
|
JohnYoung
Silver CB900F
Joined: Jun 30, 2007
Posts: 1266
Location: Johannesburg, South Africa
|
| Posted:
Thu Jan 19, 2012 8:37 am |
|
Here are the fork bottoms. I blasted them with Al-Oxide and then powdered them with Jet Black powder in my new (old) big oven I got from a colleague. The biggest items that I have powdered thus far.
Blasted:
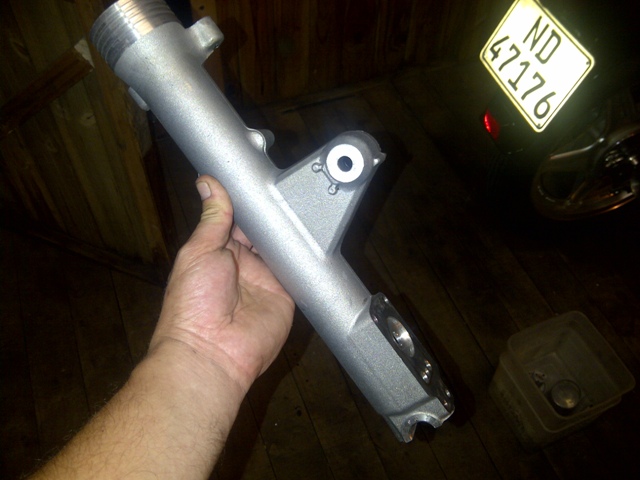
Powdered:
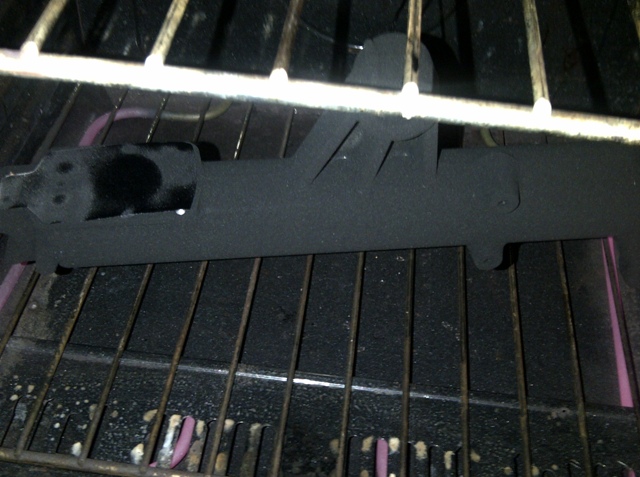
Curing and Looking Good!!! Amazing stuff.
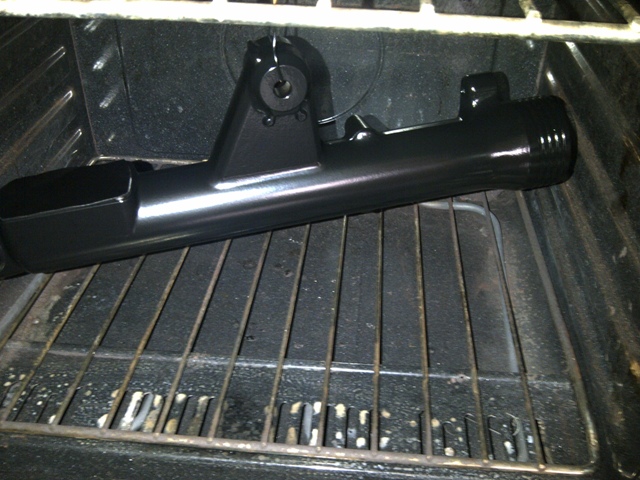
I am thinking of redoing my 750F front forks with powder as the paint is very very chipped. |
_________________
John Young
1980 CBX1000 (New)
1981 CB750F (winner or 20 concours´ - now retired)
1982 CB450T (Wife´s)
1983 CB1100F (Mine) |
|
|
|
|
JohnYoung
Silver CB900F
Joined: Jun 30, 2007
Posts: 1266
Location: Johannesburg, South Africa
|
| Posted:
Thu Jan 19, 2012 9:15 am |
|
Polishing the aluminium bits is my favourite part (NOT!!!). I used the same procedure that I did on my 750F. It is fool proof and is guaranteed to work. I did all this in one day. It is VERY labour intensive and a VERY dirty job, but well worth the effort.
My procedure is as follows.
1. Clean the parts with a good degreaser
2. Remove all blemishes and sand the entire surface with 100grit
3. Repeat with 400grit
4. Repeat with 800grit
5. Repeat with 1,200grit until all previous sanding scratches are gone, and you get a nice even dull finish
6. Buff with a good metal polish.
Please note that all sanding is wet sanding.
Footpeg plates before:
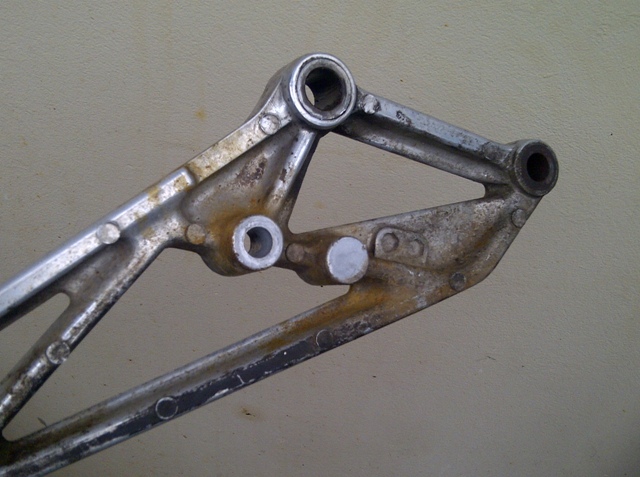
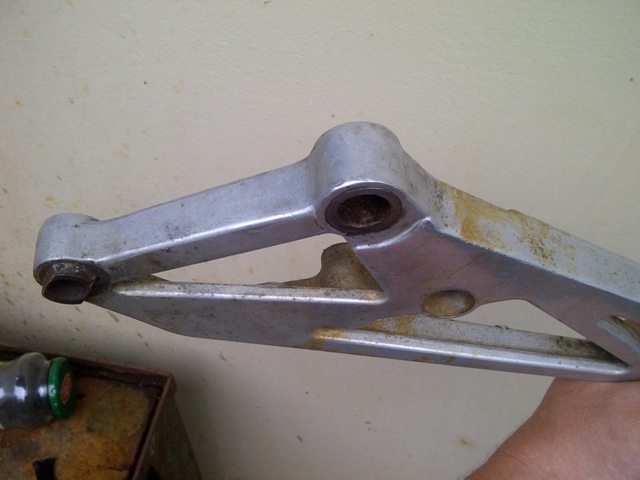
After the sanding process is complete:
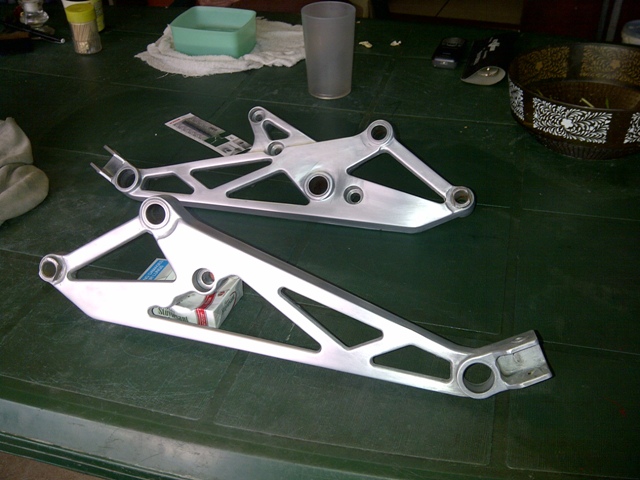
The bottom plate has been buffed. Some may prefer the matt look above?
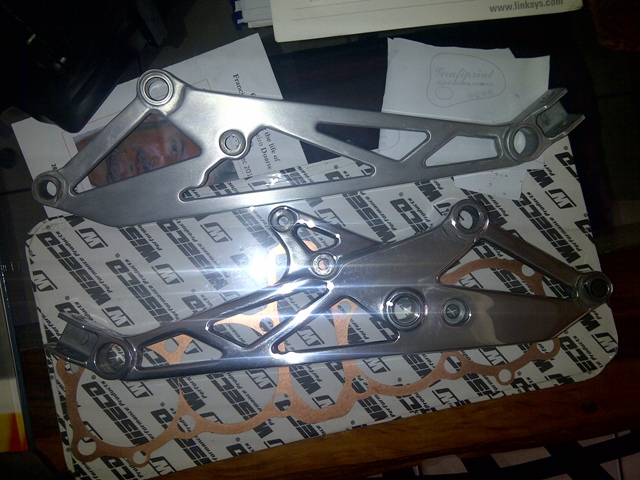
I will not be looking for lattice rearsets (they are quite popular here in SA), I am going to try riding with my feet in the more forward position. It may be more comfortable for me on longer rides. My 750F with rearsets just causes cramp for me on distances over 300Km's. Maybe I am just getting old.
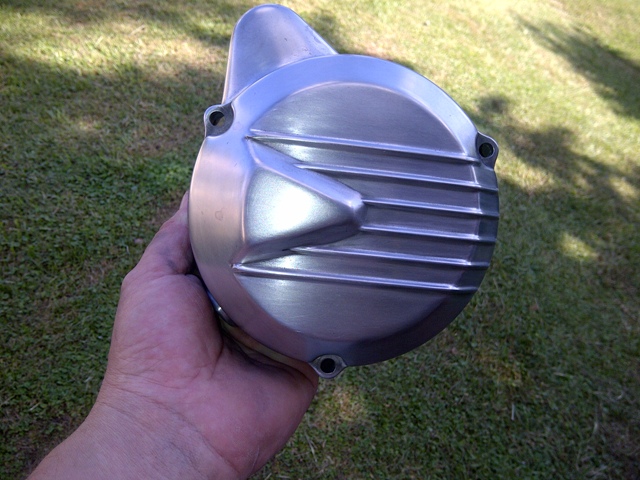
Rotor/Alternator Cover:
After the sanding process:
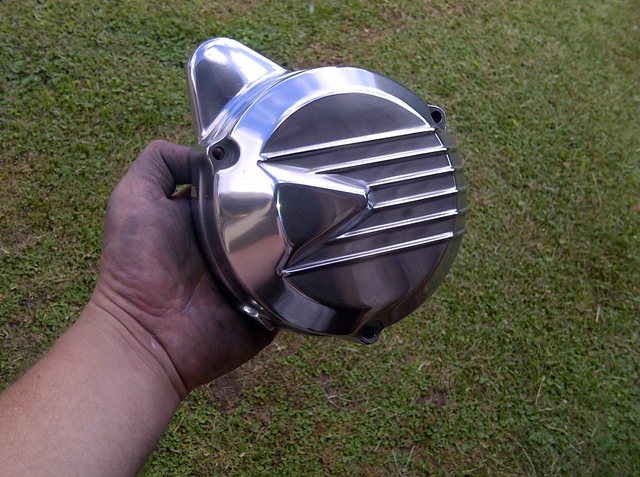
During:

After:
View of darkest Africa from my workshop door. There are Lions, Leopards and Cheetah just beyond that bush:
Lol, just kidding. |
_________________
John Young
1980 CBX1000 (New)
1981 CB750F (winner or 20 concours´ - now retired)
1982 CB450T (Wife´s)
1983 CB1100F (Mine) |
|
|
|
|
JohnYoung
Silver CB900F
Joined: Jun 30, 2007
Posts: 1266
Location: Johannesburg, South Africa
|
| Posted:
Thu Jan 19, 2012 9:55 am |
|
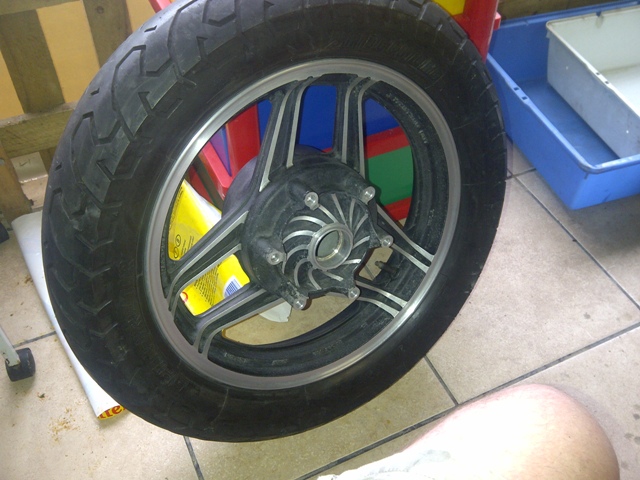
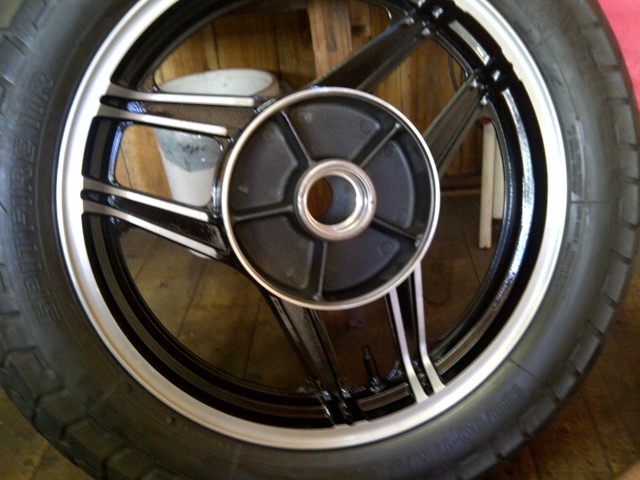
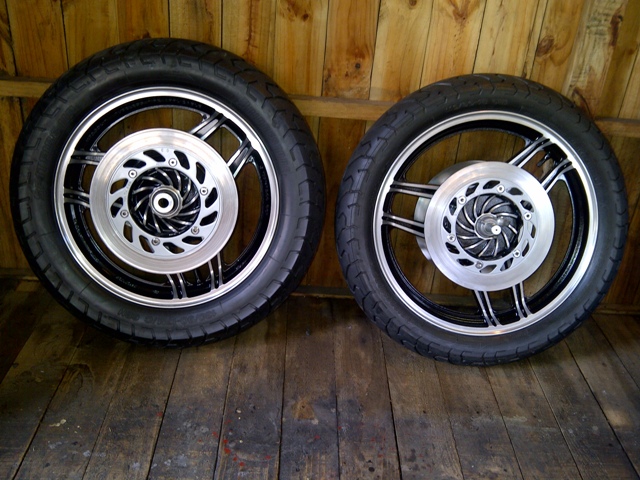
The wheels were a PITA, but I was very happy with the results. I replaced all bearings and seals and chose to paint the rims with a (shinier than usual) satin black vs powder. I was lucky that the tyres were still in good condition (Bridgestone Spitfire 11R's).
Here is the front rim before:
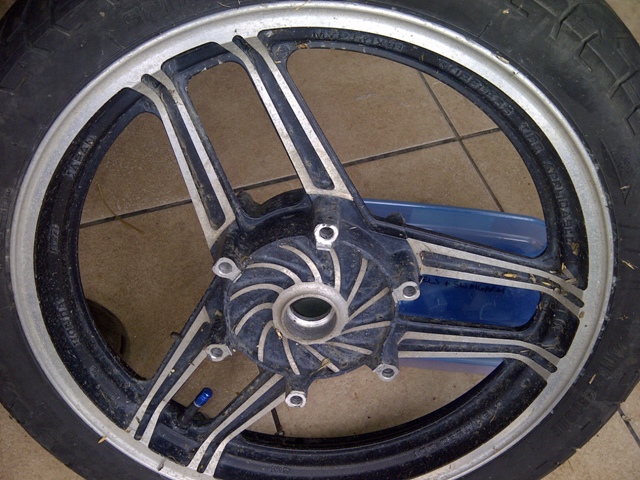
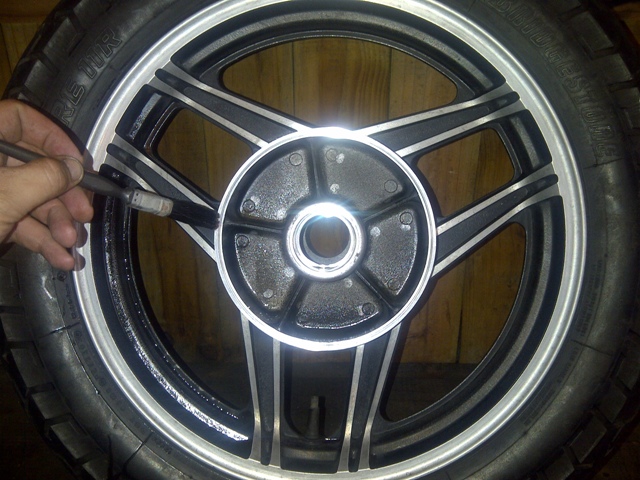
I rubbed the old coating down with water paper and cleaned the rim with lacquer thinners. Once coated with paint, I rubbed all the high spots off before the paint hardened, much easier than masking I thought. Much of a muchness. Rubbing off the high spots was a Bitch with a capital B.

All high spots off:
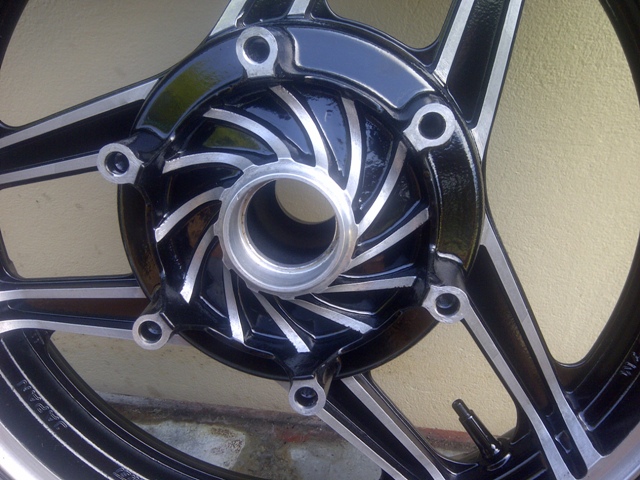
Rear wheel I followed the same procedure:
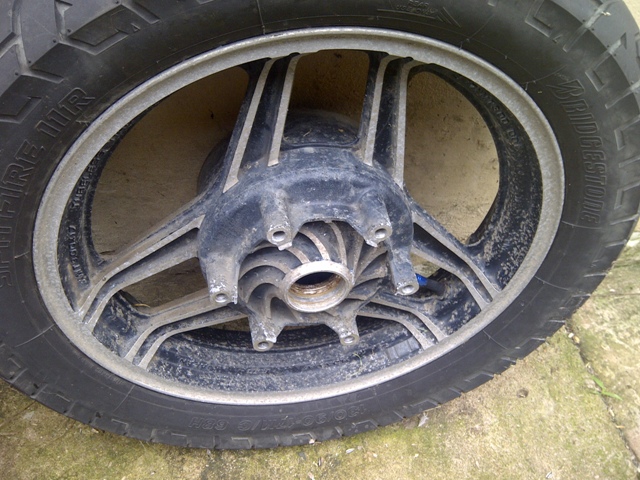
Both wheels done. Discs got new paint too.
Thanks for looking - I will post some more pics soon. |
_________________
John Young
1980 CBX1000 (New)
1981 CB750F (winner or 20 concours´ - now retired)
1982 CB450T (Wife´s)
1983 CB1100F (Mine) |
|
|
|
|
Harris T
Hawk

Joined: Dec 19, 2007
Posts: 356
Location: New Zealand
|
| Posted:
Thu Jan 19, 2012 12:23 pm |
|
Man that is an awesome job John very inspiring.
I should get off my arse & do some cleaning polishing on my bike... |
_________________
Regards
Harris
Tauranga
New Zealand |
|
|
|
|
Harris T
Hawk
Joined: Dec 19, 2007
Posts: 356
Location: New Zealand
|
| Posted:
Thu Jan 19, 2012 12:24 pm |
|
Huh Im seeing double |
_________________
Regards
Harris
Tauranga
New Zealand |
|
|
|
|
tomk1960
Red CB1100F

Joined: Nov 13, 2009
Posts: 5043
Location: Worcester, MA
|
| Posted:
Thu Jan 19, 2012 1:50 pm |
|
Extremely impressive work John. You are a man of patience with methodical attention to detail. How did you clean your carb bodies? The one in the picture looks beautiful.
That bike is going to look nicer than new when you're finished with it. Keep sharing pictures as you provide a lot of inspiration to the rest of us. |
_________________
Powder coating services, specializing in all F components as well as brake system restoration.
Dealer for Galfer, Spiegler, Apex, APE, 4-into-1, KOSO, Venhill, ProBoltUSA, and Cometic.
CB1123 RMII and WAY faster Kawasakis. |
|

|
|
Tattoo
CB1100F

Joined: Aug 12, 2008
Posts: 2972
Location: Way Down South in Dixie, Where rice was King!
|
| Posted:
Thu Jan 19, 2012 1:59 pm |
|
Awesome work the best I have seen on here by far. Well done. |
_________________
If you want to avoid criticism, say nothing, do nothing, and be nothing.
 |
|
|
|
|
Andylarkin
Friend of the Board

Joined: Oct 28, 2003
Posts: 2464
Location: Norwich, UK
|
| Posted:
Thu Jan 19, 2012 3:10 pm |
|
I hate getting to the bottom of one of John's pages only to find "that's it" for the time being with the pictures!!! 
I'm just starting my 1100R rebuild and I'm interested in how you managed that wiring loom. Does the degreaser make the tape unravel? Or do you have to remove the tape and cable tie the various bunches together?
Brilliant work mate, brilliant!
|
| |
|
|
|
|
JohnYoung
Silver CB900F
Joined: Jun 30, 2007
Posts: 1266
Location: Johannesburg, South Africa
|
| Posted:
Thu Jan 19, 2012 3:51 pm |
|
Thanks very much for all the comments guys, yes I am a pedantic pain in the arse - I got it from my dad 
Andy you hit the nail on the head, that is exactly how I do the loom. Unravelling old tape is near impossible, so I run a small pair of scissors down the loom (obviously being careful that I don't cut wire), and cut the old shit off. As I get to a bunch of wires that branch off, I cable tie them together at the stem, against the main wad of wire. That ensures the shape of the loom.
The solution I use is called Prepsol. It is a non-solvent water soluble degreaser that can be diluted to say 50:50. I use it neat to soak the loom in (a week is too long, a day will suffice - just that I forgot about mine). It even removes all the sticky stuff left by the old tape, and cleans the connector blocks and the connectors themselves. Being non solvent means it will not attack plastic etc. Once soaked, rinse in water and then blow the connector blocks out with compressed air. It will look brand new afterwards. Let the loom air dry and then retape. Use a good thick electrical tape. The front section can be a little tricky where all the branches come out.
Please start a thread on your R rebuild. I was going to buy an RC, but have my eye on a clean GS1000G. this weekend.
Edit: I also clean my switches as per above. I am pretty sure the results are close to ultrasonic. |
_________________
John Young
1980 CBX1000 (New)
1981 CB750F (winner or 20 concours´ - now retired)
1982 CB450T (Wife´s)
1983 CB1100F (Mine)
Last edited by JohnYoung on Thu Jan 19, 2012 4:10 pm; edited 1 time in total |
|
|
|
|
|
|

 ::
 ::
 ::


